They say you never forget how to ride a bike. Whether you’re an avid cyclist or someone who hasn’t touched a bicycle since childhood, as soon as your feet touch the pedals, your body instinctively knows what to do.
Caring for your bike, however, is a different story. If you retrieve your bike from the garage only to find that it has a flat tire, you may feel inclined to abandon your riding plans altogether. Learning how to use a bike pump, though, is just as simple as riding a bike. With a standard floor or hand pump, you can get your bike back to normal within minutes.
Step 1: Determine Valve Type
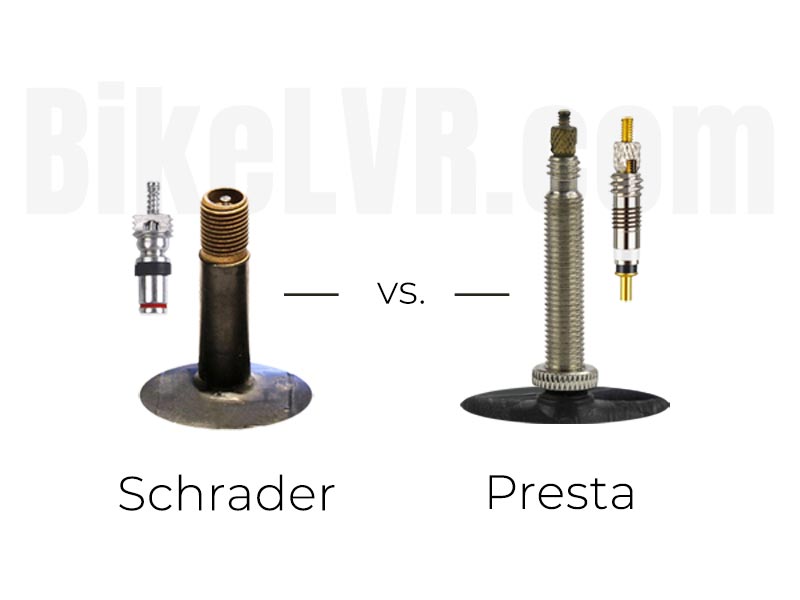
The first step in the tire repair process is to determine which type of valve your bike uses. Bicycles usually have either a Presta valve or a Schrader valve.

Presta valves are long, thin, and pointed at the tip. They contain more parts and are slightly more complex than Schrader valves, as they have removable valve cores and locknuts for additional security. Whereas Schrader valves can be found on other vehicles, Presta valves are specific to bicycles.
Schrader valves, which are shorter and wider than Presta valves, are more common than their counterparts since they are also used for cars, motorcycles, and other transportation devices. While many believe them to be less secure than Presta valves, Schrader valves are more popular due to their ease of use.
Step 2: Remove Valve Cap
Once you’ve established the type of valve on your bike’s tire, you can remove the plastic cap covering the valve to keep it safe from dust and debris. Unscrew the cap carefully and set it aside in a memorable location so you don’t lose it during the tire pumping process.
Step 3: Check Tire Pressure
The next step is to determine your tire’s current pressure level. If you’ve ever checked the pressure in your car’s tires, then you’re already familiar with this process. You can use a pressure gauge to measure the PSI, or pressure per square inch, of your bike tire.
Inspect the tire for the recommended pressure level. As with car tires, it’s essential to get this number right, as filling a tire with too much air can cause the tire to pop, creating more problems than solutions.
It may be difficult to read the pressure amount of the tire, and sometimes tires do not list a suggested amount. If this is the case, abide by the general standards set for your type of bike. The average road bike likes a PSI ranging anywhere from 80-130 PSI. Mountain bikes, on the other hand, prefer a PSI of roughly 30. Hybrid bikes fall in the middle, requiring 40-70 PSI.
You can also feel the tire to make sure it seems to be at the correct pressure level. Your size also impacts the recommended pressure; heavier or larger riders require tires with more pressure than lighter riders.
Step 4: Determine Pump Type
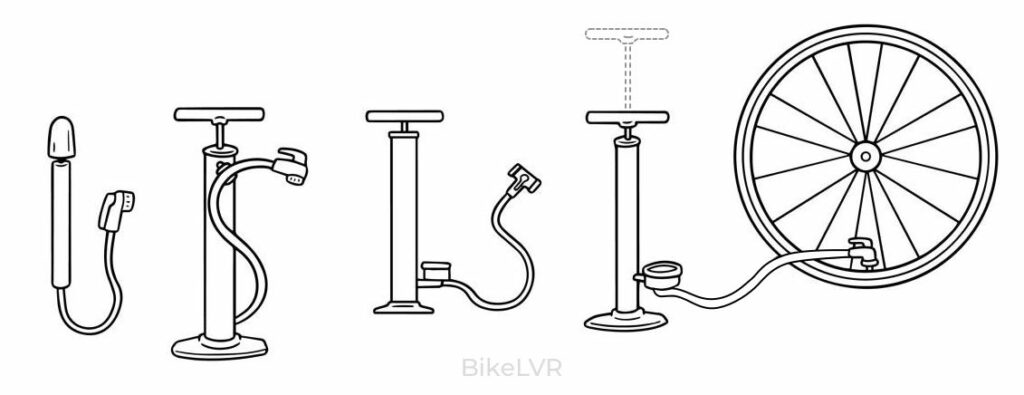
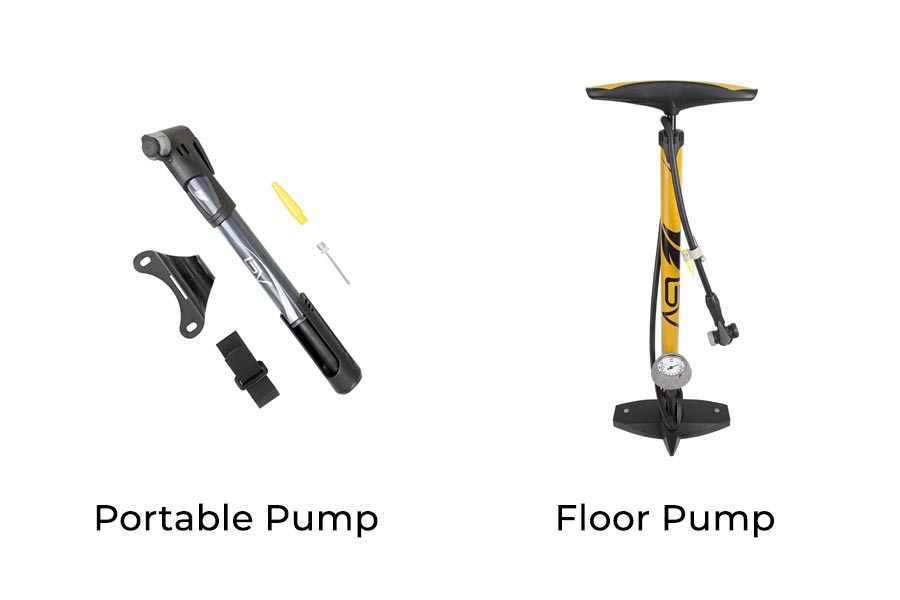
It’s critical to determine which type of bike tire pump you have to ensure proper usage. Most air pressure pumps are either floor pumps or hand pumps.
When you think of a bike pump, you probably picture a floor pump, which has a base on which you place your feet, as well as a handle that you press down to move air through the pressure hose. This type of pump is preferred by those who need a quick fix, such as competitive cyclers, as it moves more volume through the pressure hose at a speedier pace.
A hand pump usually comes with one small pedal or bulb to squeeze for inflation. This is a slower but often more controlled method of pumping. It’s useful for smaller tires that require a more precise measurement or that can be easily overfilled.
Step 5: Open Presta Valve
Now that you know which type of valve and pump you have, it’s time to start pumping air into the tire. If you have a Schrader valve, skip to the next step. If you have a Presta valve, however, you need to open the valve before moving forward.
Unscrew the valve by twisting it to the left several times. I do this by hand, but a pair of pliers may help job if the valve is screwed on tightly or if you haven’t touched your bike in a while. Once the valve is open, briefly push down on the top to release a small amount of air pressure.
If your presta valve is missing or broken this YouTube video will help.
Step 6: Fit Pump Nozzle Onto Valve
Determine the correct nozzle hole before attaching the hose. Schrader valves are wider and require a larger hole, while the slim Presta valves use a small hole. Most floor and hand pumps come with both options, so make sure to double-check that you’re using the correct one.
After identifying the correct nozzle hole, attach the nozzle to the valve by either pressing it down or screwing it on. Then, push down slightly to firmly secure the nozzle. It’s okay if a little air escapes when you do this.
If using a floor pump, you may have a pump lever. Pull up the lever until it’s at a 90-degree angle. Otherwise, you should see a push lever, which you can press in to activate the pump.
If you are using a presta valve adapter this YouTube video will help and is a great visual review of the two valves.
Step 7: Pump Air Into Tire
After attaching the pump nozzle to the valve, hold the nozzle in place with one hand. Using the other hand, pump the suggested amount of air into the tire. The amount of time it takes to do this depends on the type of pump you have. Since hand pumps are smaller and less powerful, they require more pumps and thus more time to complete the job.
If you’re using a floor pump, place your feet on the pump’s base and move the handle up and down until the tire is filled with the appropriate amount of air. Be careful not to overfill the tire, since floor pumps move a lot of air in a short amount of time.
If using a hand pump, make sure you use the correct mode. Some hand pumps have two modes: “high volume” and “high pressure.” Begin on the “high volume” setting, then switch to “high pressure” once it becomes more difficult to manually operate the hand pump.
Regardless of the type of pump, keep an eye on your air pressure the entire time you are pumping. Your pump may have a pressure gauge, making this process simple. Otherwise, you should manually check the pressure at intermittent intervals. You can also squeeze on the tire to see how firm it feels. It should be taut but have a slight give so that it doesn’t pop.
Step 8: Remove Pump From Nozzle
Once the tire has been filled to its optimal air pressure level, remove the pump from the nozzle vertically in one smooth motion. It is normal to lose a little air in this process. Minimize the amount of air released, but do not worry about losing a small amount from the bike valve.
Step 9: Close Presta Valve
If you have a Presta valve, securely twist the valve back into a closed position with your hand. Do not strip or overtighten if using pliers. You should no longer hear a “hiss” of air being released.
Step 10: Replace Valve Cap
Locate the plastic valve cap, and reattach it to the tire’s valve. Make sure everything is securely in place to protect the valve from damage. At this point, you may also want to do one final inspection of the pressure, valve, and tire to ensure you run into no problems when you get your bike back onto the road or dirt.
Once you’ve placed the cap back on the valve, you have successfully completed the process. In just a few short minutes, you bike is road ready!
Now you know how to pump a bike tire🥇
Now that you know how to pump a bike tire, proper bike maintenance is as easy as riding a bicycle that still has on its training wheels. Never again will you have to disappoint your kids by telling them their bicycle has a flat tire that cannot be fixed, nor will you have to miss the next ride in your area due to low pressure problems.
No matter your age, riding style, or riding frequency, investing in tires for your chosen bike terrain, and the right bike pump ensures the best biking experience for you, your family, and your bike ride.

🔍 Bike Pump FAQ’s:
How does my bike pump work?
A bike pump compresses the air, which is then pushed down the tube and into the tire. The valve is forced open by the air pressure. When the handle is raised, the valve shuts, preventing the air from escaping. The compressed air reverses back into the cylinder, and the process is repeated. With this mechanism, the bike tire is adequately inflated, ready for cycling.
A bicycle’s tire pressure relies on a hand-operated piston within a pump. The upward motion of the piston draws outside air through a one-way valve. On the downward motion, the piston compresses the air and directs it into the tire. Floor pumps, also known as track pumps, often include a built-in pressure gauge. Air compressors or other Electric pumps (my daughter’s kiddie pool) could be used to inflate bike tires if the correct Schrader or Presta connector is available.
Bike pump lever up or down?
The bike pump lever should be up when you are pumping air into your tire. This will help to prevent air from escaping from the tire. When you are finished pumping, you can then push the lever down to close the valve and prevent any more air from escaping.
How do you use a hand bike pump?
Here are the steps on how to use a hand bike pump:
- Remove the dust cap from the valve on your bike tire.
- If you have a Presta valve, open the valve by turning the valve core counterclockwise.
- Attach the pump nozzle to the valve.
- Pump the air into your tire until it reaches the desired pressure.
- Detach the pump nozzle from the valve.
- Replace the dust cap on the valve.

